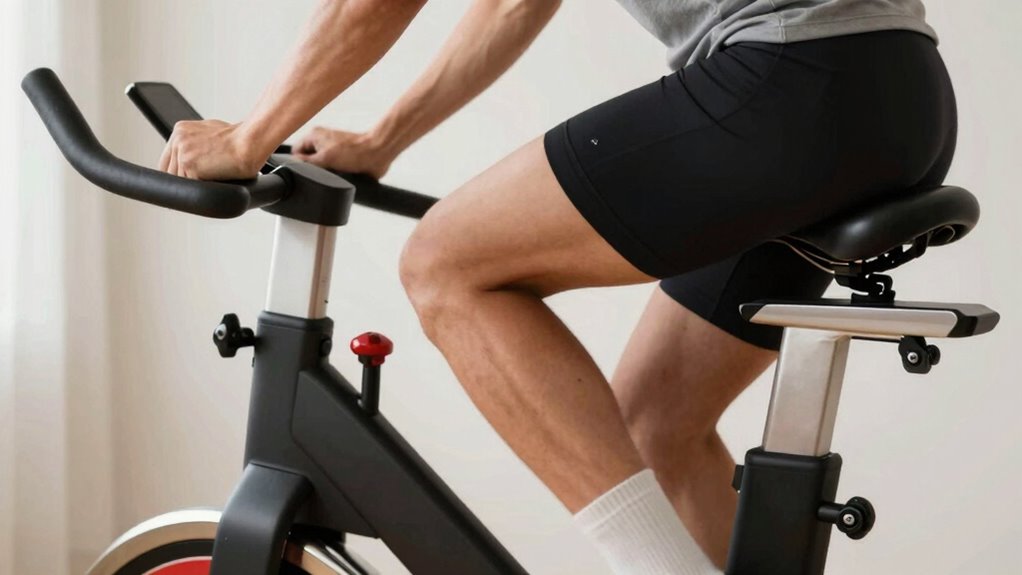
To set up your indoor cycling bike for healthy knees and back, start by adjusting your saddle height so your knee has a slight bend (25-35°) at the bottom of each pedal stroke. Keep your handlebars level or slightly higher to maintain a comfortable back position. Make certain your feet are properly aligned with pedals, and knees track straight over your toes. Good posture and consistent adjustments are key—if you want detailed tips, keep exploring these setup essentials.
Key Takeaways
- Adjust saddle height so your knee has a 25-35° bend at the pedal’s lowest point to prevent joint strain.
- Set handlebars level with or slightly above the saddle to promote an upright, back-friendly posture.
- Ensure knees track straight over the toes during pedaling to avoid misalignment and knee pain.
- Use mirrors or video to monitor and correct knee and pedal alignment for efficient movement.
- Regularly check and fine-tune fit to maintain proper posture, prevent discomfort, and support long-term musculoskeletal health.

Shcobomo Bicycle Bike Seat Cushion Height Measuring Tool, Precision Gauge for MTB & Road Bike Saddle Adjustment, Magnetic Height Adjustment Tool for Cycles, Universal Fit for All Bike Types
Scientific Measurement for Optimal Riding: With the MTB road bike saddle measure tool, quickly and precisely find your…
As an affiliate, we earn on qualifying purchases.
As an affiliate, we earn on qualifying purchases.
Why a Proper Bike Fit Is Essential for Your Knees and Back
A proper bike fit is essential because it directly affects your knees and back during indoor cycling. When your bike isn’t correctly adjusted, you risk knee pain from overextending or misalignment, which can lead to long-term injury. Poor fit also causes back strain, as you might hunch or overstretch to reach the handlebars comfortably. When your seat height, handlebar position, and frame size are right, you maintain proper posture and reduce stress on these areas. This careful adjustment can also prevent the development of musculoskeletal discomfort**, ensuring that your workout remains safe and enjoyable. Additionally, paying attention to equipment safety standards can help you avoid potential hazards related to faulty or improperly maintained gear. Ignoring fit details can lead to discomfort that discourages regular workouts and potentially worsens existing issues. Investing time in a proper fit ensures you ride safely, comfortably, and with minimized risk of injury. Moreover, understanding ergonomic principles can further optimize your setup for comfort and efficiency. Proper bike fit also encourages better ergonomic posture, promoting overall health benefits beyond just immediate comfort. Taking the time to learn about adjustment techniques** can help you make precise modifications tailored to your body’s needs, enhancing your cycling experience.

CyclingDeal 1 Pair of Handlebar Extenders for Indoor Exercise Bike – Great Handlebar Extension Accessory for Peloton – Compatible with Bicycle Handlebar Grips – Package with Handlebar Grips
RIDE IN COMFORT – Enhance your indoor cycling experience with our patented Swept-Back handlebar extenders, allowing for customizable…
As an affiliate, we earn on qualifying purchases.
As an affiliate, we earn on qualifying purchases.
How to Adjust Your Indoor Cycling Bike for the Right Seat Height
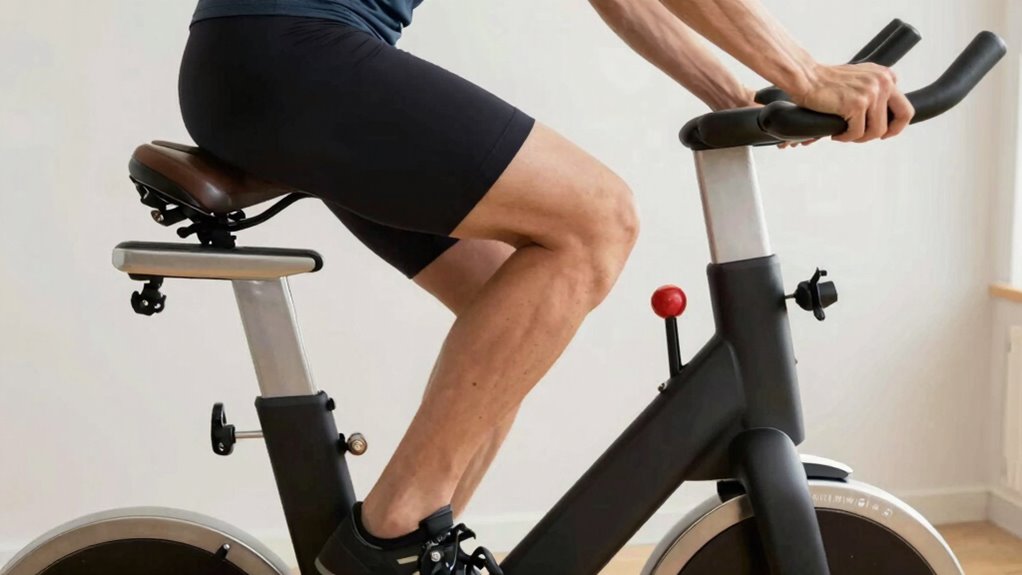
Ensuring your seat height is properly adjusted is crucial for a comfortable and efficient indoor cycling experience. When your seat is at the right height, you can maintain a smooth pedal cadence without overextending or putting strain on your knees. To set it correctly, stand next to your bike and position the saddle so it’s roughly at hip level. Sit on the saddle and place your foot on the pedal at the bottom of the stroke; your knee should be slightly bent, about 25-35 degrees. Use bike accessories like a level or a tape measure for precise adjustment. Remember, proper seat height helps prevent injuries and improves performance, making every pedal stroke more effective and enjoyable. Adjusting bike fit is essential for long-term comfort and injury prevention. Additionally, maintaining proper knee alignment can reduce the risk of joint strain during rides, especially as you focus on creative storytelling for branding to motivate your fitness journey. Proper bike setup also includes considering the efficiency of solar panels, which can power your indoor cycling space sustainably if you incorporate solar energy solutions.

BV Bike Pedal with Toe Clip Cage – 2-Set, Universal Fit Bike Pedals 9/16" Compatible, Non-Slip & Durable Lightweight, Fits Most Adult Bikes & MTB Bicycles
Universal Bike Pedal with Toe Clip Cage
As an affiliate, we earn on qualifying purchases.
As an affiliate, we earn on qualifying purchases.
Position Your Saddle for Optimal Knee Alignment

To guarantee your knees stay healthy and efficient, you need to position your saddle correctly. Adjust the saddle height and fore-aft position so your knees track straight over your pedals without excessive movement. Keep an eye on your knee tracking to make sure everything stays aligned during your ride. Incorporating proper bike fit basics can help prevent injuries and improve your cycling experience. Ensuring your saddle height is correctly set is essential for knee health, reducing strain and discomfort during long rides. Additionally, paying attention to ergonomic adjustments can further enhance comfort and efficiency on your bike. Following expert evaluations on proper setup can also guide you in achieving the optimal fit for your body, especially considering adjustments for comfort to prevent long-term issues.
Saddle Height Adjustment
Are you positioning your saddle at the right height for comfortable and efficient riding? Proper saddle height ensures ideal knee alignment, reducing strain and maximizing power. To find your ideal height, sit on your bike and place your heel on the pedal at the bottom of the stroke. Your leg should be straight, with a slight bend when you pedal normally. When you ride with the ball of your foot, your knee should be slightly bent at the top of the pedal stroke. Adjust the saddle so that your knee tracks over the pedal axle, not too far forward or back. Use this table as a quick reference:
| Saddle Height | Knee Alignment |
|---|---|
| Too low | Excessive bend, knee forward |
| Too high | Hyperextension, knee back |
| Correct | Slight bend, knee over pedal |
Fore-Aft Saddle Position
After setting your saddle height, adjusting its fore-aft position is key to maintaining proper knee alignment throughout your ride. Move the saddle forward or backward on its rails to ensure your knee cap lines up directly over the pedal axle when the pedal is at 3 o’clock. Be mindful of saddle tilt; a slight downward tilt can improve comfort and stability, but avoid excessive angles that cause discomfort. Also, consider your saddle width—if it’s too narrow or wide, it can affect your pelvic stability and overall alignment. Proper fore-aft positioning helps distribute your weight evenly, reducing knee strain and improving power transfer. Take your time to make small adjustments and test your position to find the most comfortable, efficient setup. Additionally, paying attention to your cycling posture can further enhance comfort and prevent injury. Incorporating proper bike fit principles, including saddle position, is essential for long-term comfort and injury prevention. Being aware of biomechanical alignment can guide you in making precise adjustments that support your body’s natural movement. Ensuring your knee tracking stays aligned can further optimize your cycling efficiency and reduce fatigue.
Monitoring Knee Tracking
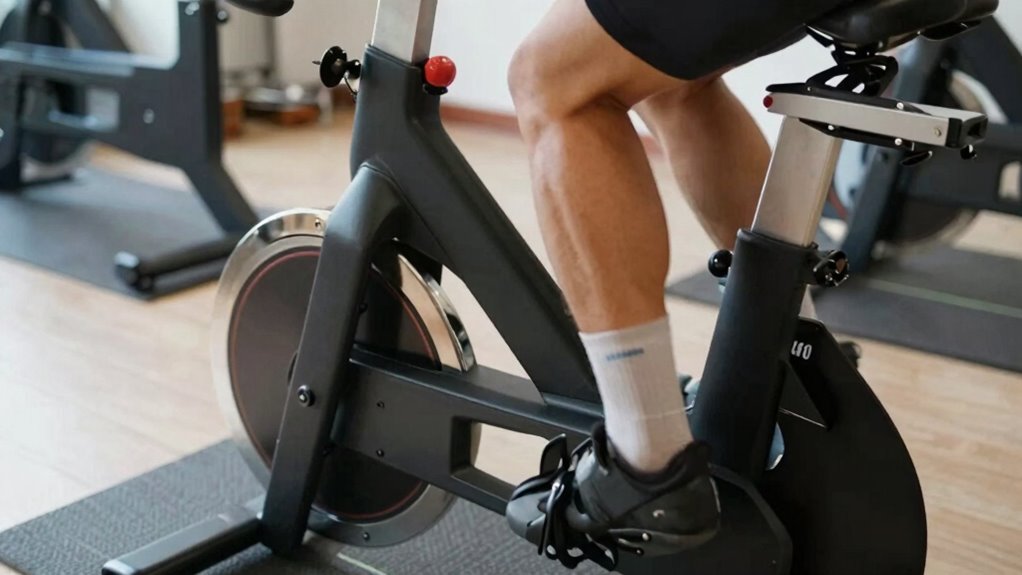
How can you guarantee your knee tracks properly during your ride? The key is monitoring your knee tracking and ensuring proper pedal alignment. Start by observing your knees during pedaling; they should move in a straight line over your toes. If your knees drift inward or outward, adjust your saddle height or fore-aft position. Proper pedal alignment helps prevent unnecessary strain and injury. Use this table as a quick guide:
| Issue | Solution | Result |
|---|---|---|
| Knee drifts inward | Check saddle height; adjust | Better knee tracking |
| Knee drifts outward | Ensure foot is aligned on pedal | Proper pedal alignment |
| Excessive side-to-side movement | Use mirror or video to assess | Stable pedal motion |
| Knee pain | Reassess saddle position | Reduced strain |
| Pedal alignment | Confirm cleat placement | Improved knee tracking |
Monitoring knee tracking and pedal alignment keeps your ride safe and efficient. Additionally, maintaining awareness of biomechanical principles can further optimize your setup and prevent discomfort. Recognizing proper joint movement during pedaling can also help identify asymmetries early and address them proactively. Paying attention to muscle engagement can improve overall pedaling efficiency and reduce fatigue. Incorporating proper body mechanics into your routine can further enhance comfort and performance over time. Being mindful of musculoskeletal health can also contribute to preventing injuries related to improper alignment.

BriskMore Handlebar Bike Mirror, Scratch Resistant Glass Lens, Ajustable And Rotatable Safe Rearview Bicycle Mirror for Left Side BT-016L
★ HD automotive grade convex glass bike mirrors with safe shatterproof film,allowing you to see clearer and sharper…
As an affiliate, we earn on qualifying purchases.
As an affiliate, we earn on qualifying purchases.
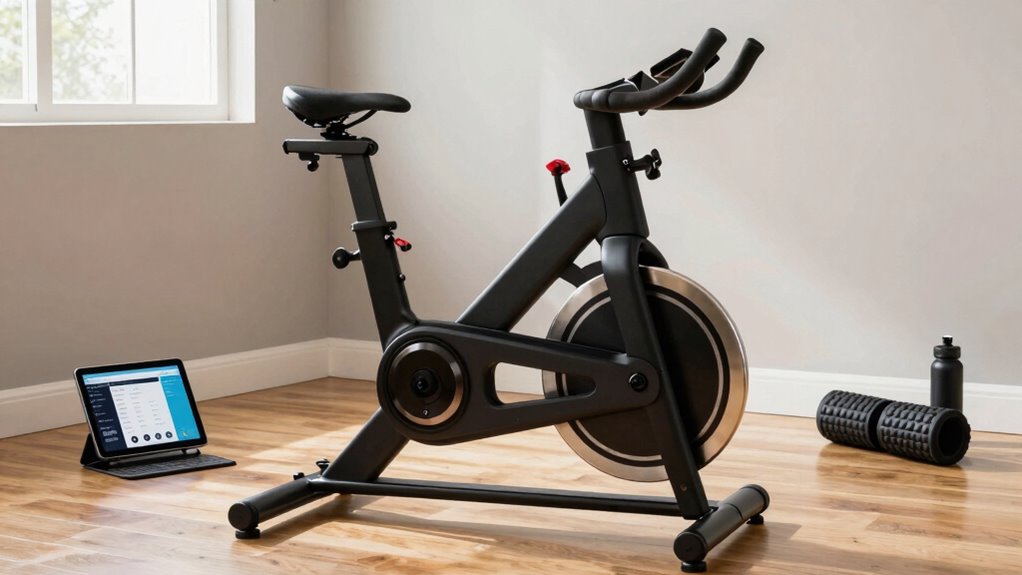
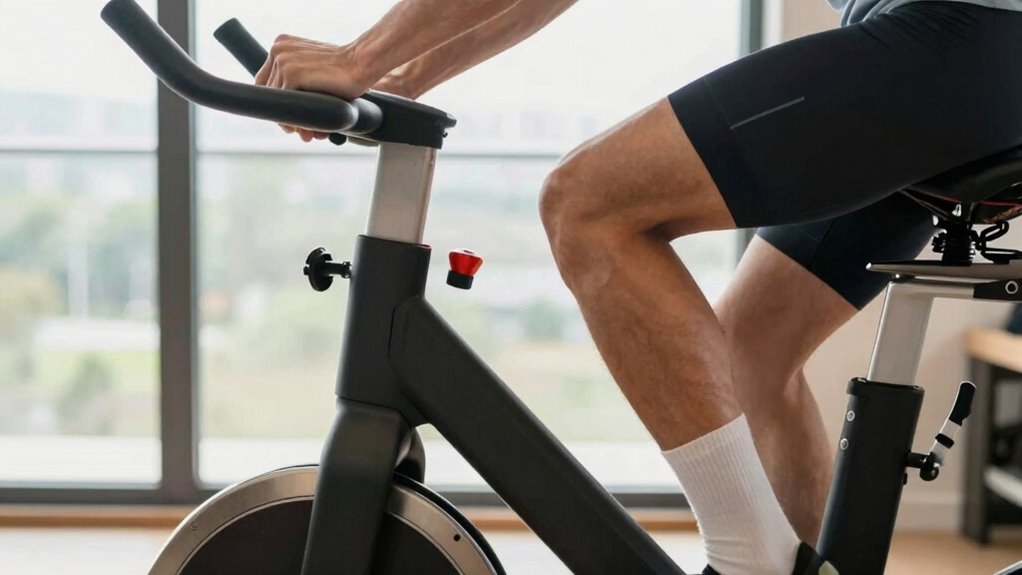
Set Handlebar Height to Keep Your Back Comfortable

To stay comfortable during your ride, you need to find the prime handlebar height. Adjusting the handlebars correctly can prevent back strain and improve your posture. Let’s explore how to set the handlebar height for maximum comfort. Ensuring your bike is properly bike fit can also help reduce discomfort and enhance your riding experience. Proper handlebar positioning is an important aspect of bike safety, helping to maintain control and prevent injuries during your ride. Additionally, making small, incremental adjustments can help you fine-tune your setup for optimal comfort and ergonomic alignment. Using the right adjustment tools can make this process easier and more precise. Remember that consistent adjustments based on your riding style can further improve your overall comfort and performance.
Optimal Handlebar Height
Setting your handlebar height correctly is essential for maintaining a comfortable and efficient riding position. When adjusted properly, handlebar ergonomics help reduce strain on your back and neck while promoting better posture. Typically, the handlebar height should be level with or slightly above your saddle height, depending on your flexibility and comfort. A higher handlebar can ease back tension and support a relaxed upper body, especially if you prefer a more upright riding position. Consider grip variations—using different hand positions on the handlebars can also improve comfort and reduce fatigue during longer rides. Ensuring your handlebars are set to the right height helps you stay comfortable, maintain proper back alignment, and prevent discomfort or injury over time.
Adjust for Comfort
Adjusting your handlebar height for comfort guarantees your back stays relaxed during rides. When the handlebars are at the right height, you can maintain a natural posture, reducing strain on your lower back. This also helps you keep a steady pedal cadence without overextending or hunching forward. Make certain your cycling shoes fit snugly and are properly aligned, as improper fit can cause discomfort and impact your overall posture. If your handlebars are too high, you might feel less control; too low, and you risk back or neck strain. Find a position where your back remains straight and your shoulders are relaxed. Small adjustments can make a big difference in comfort, helping you stay engaged longer without fatigue or pain.
Common Bike Fit Mistakes and How to Fix Them
Many cyclists make common bike fit mistakes that can lead to discomfort, decreased performance, and even injury. One mistake is not paying attention to your pedal stroke, which can cause knee strain and inefficient power transfer. You might also overlook cadence optimization, riding too fast or too slow without adjusting your setup accordingly. Another frequent error is saddle height being too high or low, affecting your pedal efficiency and risking joint pain. Overreaching handlebars or improper handlebar height can strain your back and neck. To fix these issues, verify your saddle is at the correct height for an efficient pedal stroke, and adjust your cadence to match your comfort and fitness level. Regularly check your bike fit to prevent these common mistakes and ride smoothly.
Tips for Maintaining Good Posture During Your Ride
Maintaining good posture during your ride is essential for comfort and injury prevention. Keep your back straight and shoulders relaxed to avoid strain. Focus on steady breathing techniques—inhale through your nose, exhale through your mouth—to stay relaxed and improve endurance. Maintaining an ideal pedal cadence helps reduce knee stress and keeps your posture aligned. Adjust your bike so your hips are level and your knees track straight over your toes.
| Tip | Benefit |
|---|---|
| Keep your core engaged | Supports your back, reducing fatigue |
| Relax your shoulders | Prevents tension and neck pain |
| Maintain even pedal cadence | Ensures consistent effort, less joint strain |
| Use proper breathing | Improves oxygen flow, keeps body relaxed |
When to Get a Professional Bike Fitting Help
Knowing when to seek professional bike fitting help can make a significant difference in your comfort and performance. If you experience persistent knee pain, lower back discomfort, or notice your cycling footwear isn’t providing enough support, it’s time to get expert assistance. Poor bike fit can lead to inefficient pedaling and increased injury risk. Additionally, if you find yourself constantly adjusting your bike or neglecting bike maintenance, a professional fit can optimize your setup. A fitting session can help you identify subtle misalignments that cause discomfort. Remember, investing in a proper fit guarantees your cycling footwear works effectively. Consider these signs as cues to seek help:
- Ongoing pain despite adjustments
- Frequent bike setup changes
- Difficulty maintaining proper posture
Frequently Asked Questions
How Often Should I Recheck My Indoor Cycling Bike Fit?
You should recheck your cycling posture and saddle height every 4 to 6 weeks or if you notice discomfort. Regular adjustments ensure your bike fit remains ideal, preventing strain on your knees and back. Changes in flexibility, strength, or riding intensity can affect your setup. Keep an eye on how you feel during rides and make small tweaks as needed to maintain comfort and efficiency.
Can a Poor Fit Cause Long-Term Injury?
A poor fit can cause injury faster than a cheetah on the hunt. If your bike isn’t properly adjusted, you might develop knee pain or back strain that worsens over time. Ignoring discomfort can lead to long-term damage, potentially sidelining you from cycling altogether. Always guarantee your bike fit is correct, and listen to your body—taking action at the first sign of pain helps prevent serious injury down the road.
What Tools Are Necessary for a DIY Bike Fit?
To do a DIY bike fit, you’ll need essential bike fit tools like a tape measure, a spirit level, and an adjustable wrench. These tools help you make accurate DIY adjustments to your saddle height, handlebar position, and cleat placement. Start by measuring saddle height and reach, then tweak your bike accordingly. Using these bike fit tools guarantees a proper fit, reducing discomfort and preventing injuries during your indoor cycling sessions.
How Do I Know if My Handlebar Position Is Correct?
You’ll know your handlebar position is correct when your handlebar height feels comfortable and keeps your back and shoulders relaxed. Check your hand position—your wrists should be straight, not bent, and your elbows slightly bent. Coincidentally, when your handlebars are at the right height, you’ll notice less strain in your neck and back. Adjust until you feel balanced, stable, and free of discomfort during your ride.
Is a Professional Bike Fitting Worth the Cost?
A professional bike fitting is definitely worth the cost because it guarantees your bike setup promotes proper alignment, reducing the risk of injury and discomfort. With a personalized bike fitting, you’ll find the ideal handlebar and saddle positions, which can prevent knee and back pain. Investing in a professional fitting helps you ride more efficiently, comfortably, and safely, making it a smart choice for long-term injury prevention and improved performance.
Conclusion
Getting your indoor cycling setup right is like tuning a fine instrument—you’ll perform better and prevent injuries. By paying attention to your bike fit, you ensure your knees and back stay happy and healthy through every ride. Remember, small adjustments can make a world of difference, turning your workout into a symphony of comfort and efficiency. Keep tuning your setup as you go, and enjoy the ride without letting discomfort be the shadow that dims your progress.